
The Data Exploration Tool is the Kids First Portal’s visual and intuitive tool for browsing available datasets, building virtual cohorts of participants, and identifying data files for analysis.
Filters in the Data Exploration Tool
When you first load the Data Exploration tool, the full contents of the Kids First Portal are summarized for you. As you use the tool to build your query, the number of participants, biospecimens, and data files is progressively narrowed down to just those you wish to analyze.
Imagine the Data Exploration Tool as a large funnel. At the top of the funnel, its widest part, the full collection of Kids First data is represented. Applying filters narrows this collection to more specific subsets, for example just participants that are female, just specimens that are buccal cells, or just files that are genome alignments. Each of these narrows down the funnel to its focused bottom – the subset of Kids First data that is relevant to your research question.
The Data Exploration Tool allows users to build very specific queries by applying multiple filters simultaneously, for example to find the genomic alignments that have been derived from buccal cells from female participants.

The Data Exploration Tool on the Kids First Portal. No filters have been applied at this time and the full data set is represented (26.6k participants).>
Does your Summary tab look different? Users can rearrange the size and positions of the graphs that are displayed.
Summary graphs can be rearranged by dragging and dropping to different positions on the Data Exploration Tool.
Users can build specific queries by applying filters one of two ways.
Applying Filters Using the Filter Column
The left-most column on the Data Exploration Tool is the Filter Column. Users can select filters from this column to apply to the dataset represented in the rest of the window. Filters are organized into three broad categories
- Participant Filters, including study, demographic, and diagnostic filters
- Biospecimen Filters, including sample type and availability filters
- Data File Filters, including data category and file format filters
Select a filter by choosing one from the right column. It will appear in the filter box in the center of the screen. You’ll notice that the number of participants will be updated to reflect this filter.
Applying a filter for all female participants in the Kids First Portal using the Filter Column.
Applying Filters Using the Summary Tab
The same filters can also be applied by using the Summary Tab of the Data Exploration Tool. The Summary Tab displays a graphical representation of summary statistics about the cohort that is currently selected. By finding the appropriate demographic, phenotype, or data type and selecting it, a filter will be applied for just that characteristic.
Applying a filter for all female participants in the Kids First Portal using the Summary Tab.
Note that the graphs in the Summary Tab update every time a new filter is applied to the cohort, regardless of how the filter was applied.
Applying Multiple Filters
Applying a second filter will add it to the existing query, narrowing the cohort even further. For example, to select “female participants with genomic data available,” first choose a filter for Sex = Female and then choose a filter for Data Category = Genomics.
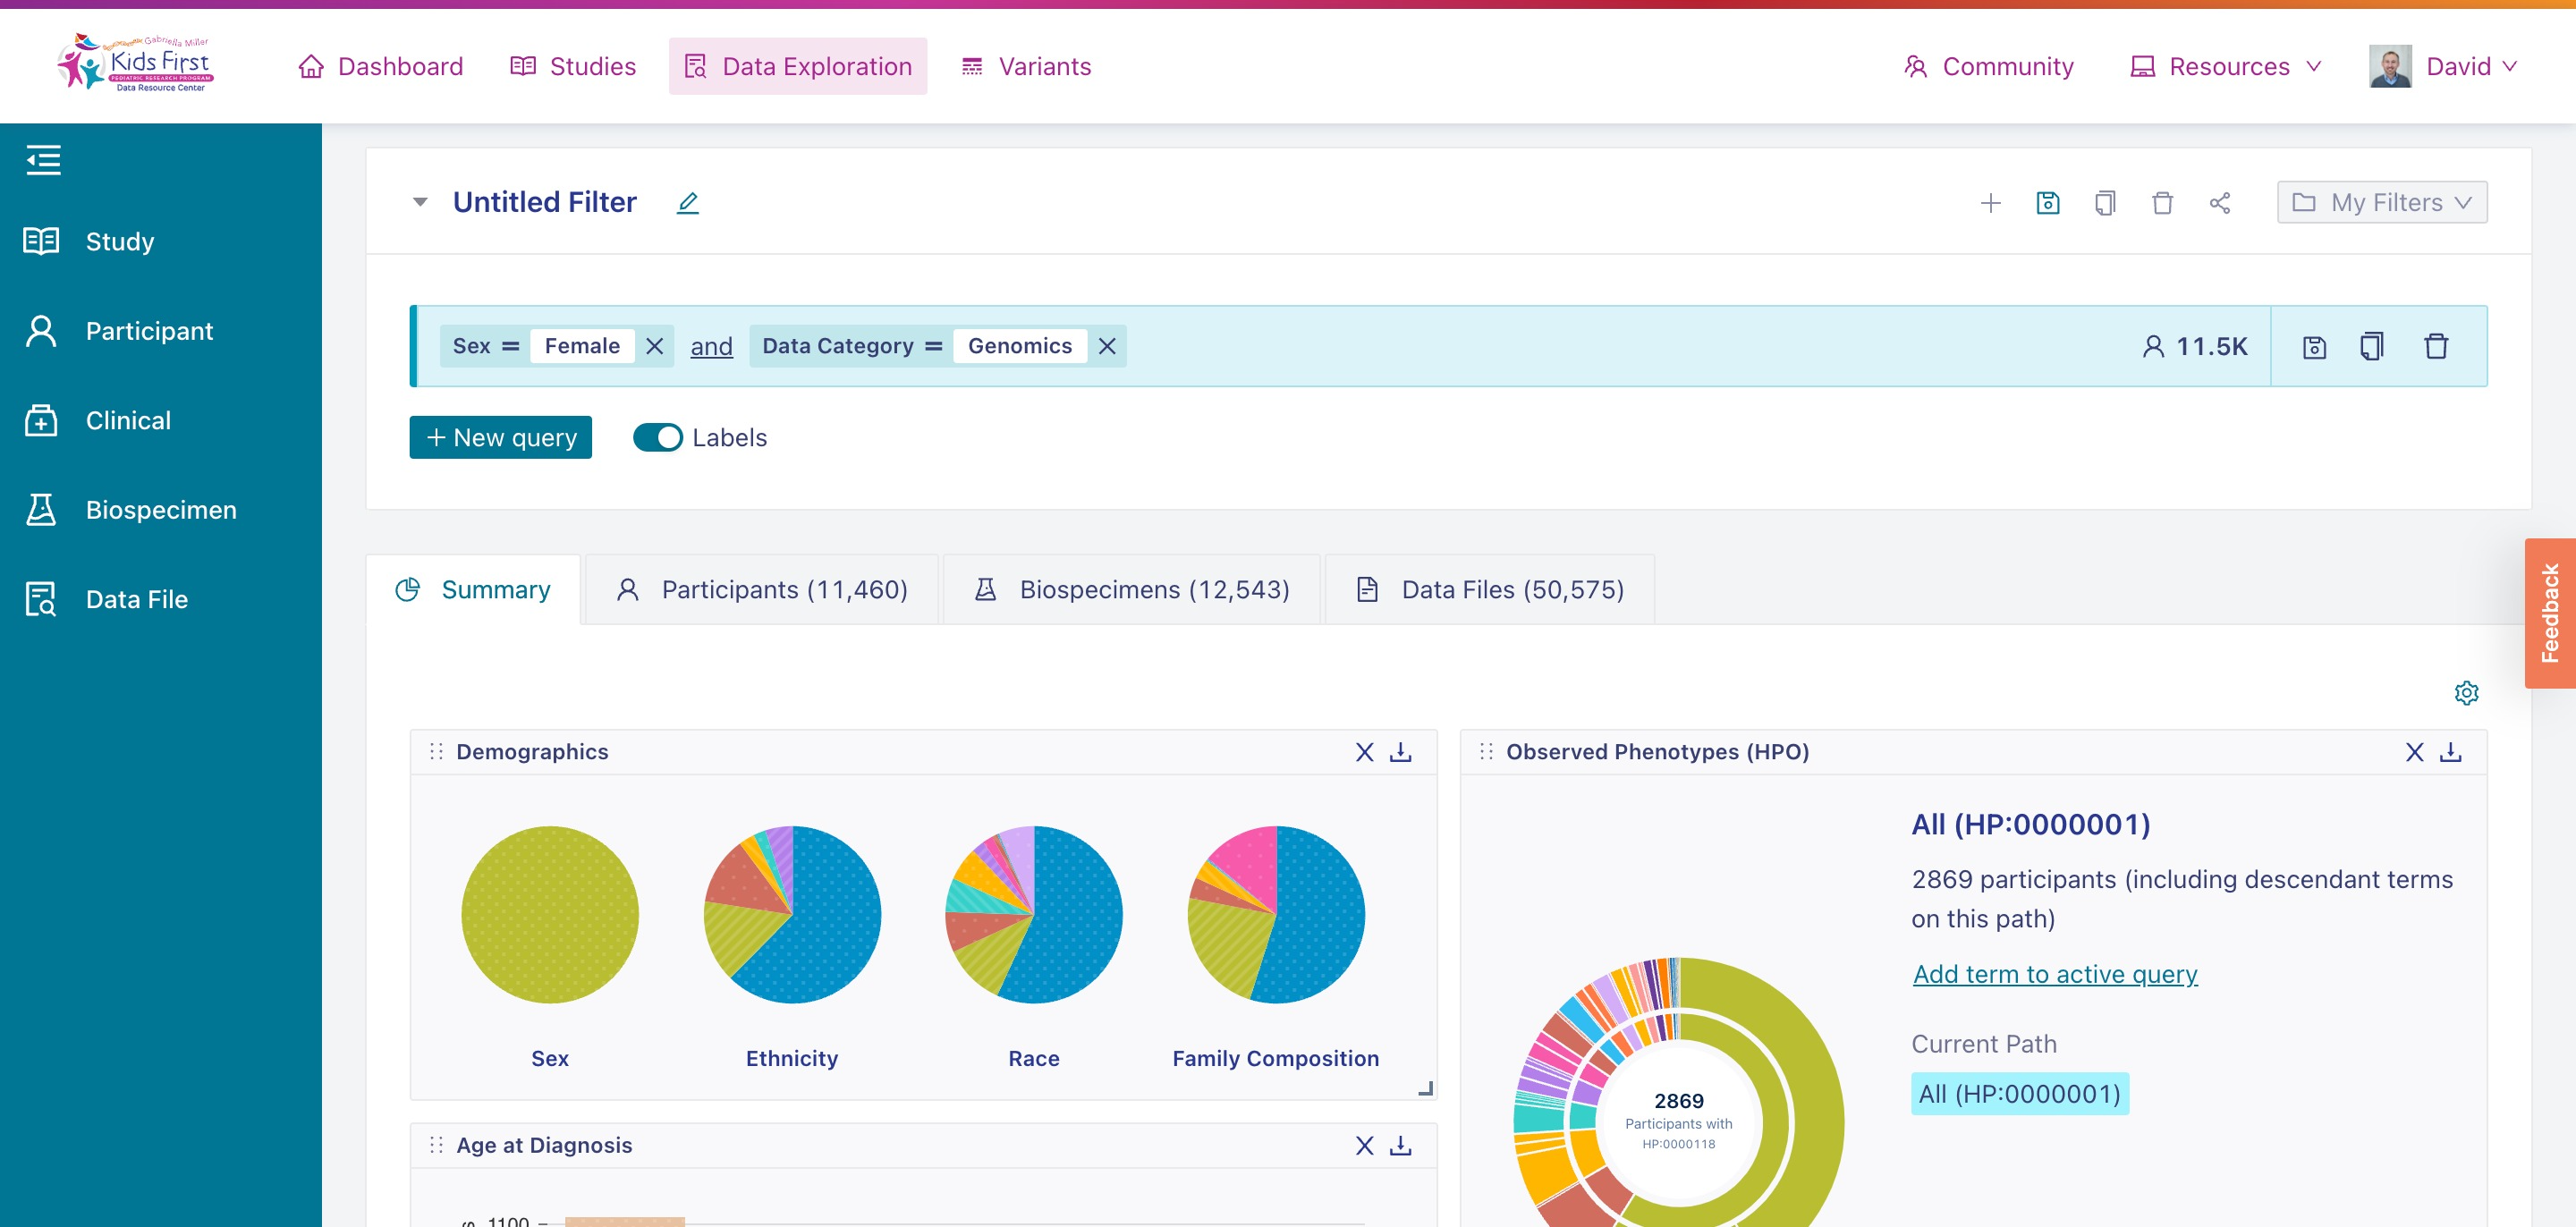
Now that a second filter for Data Files categorized as “Genomic Data” has been applied, notice that the total number of participants represented in the Summary Tab is decreased.
Naming, Saving, and Reopening Filters
Once you have a filter created you wish to save, you can give it a name to help identify it in the future. Do this by selecting the pencil icon at the top of the page.
Now that a second filter for Data Files categorized as “Genomic Data” has been applied, notice that the total number of participants represented in the Summary Tab is decreased.
Once your filter has a name, it is automatically saved for you. You can pull up this same filter again using the My Filters button in the top right of the Data Exploration Tool, or by selecting it on the Data Hub Dashboard page.